
What is an establishing shot?
The word establish means to set up or show. In video terms, the establishing shot sets up the scene or shows where the scene is taking place. The establishing shot provides context for the viewer.
You’ve seen this in every TV show and movie you have ever watched.
Consider a sitcom like Seinfeld. If you watched the show you know that one of the main places of action was the coffee shop. Can you here the popping bass notes as the camera zooms into the coffee shop for just a few seconds before we join the cast already inside at their favorite table? That’s the establishing shot.
Why do I need it?
It is a best practice to show the viewer where you are, how many people are in the room, and what your sanctuary looks like. It puts them at ease and allows them to enter into the flow of the service.
A first time viewer to your program might be asking any or all of these questions:
- Where are you?
- How many people are there? Are the seats full or empty?
- What do the people that attend look like?
- What does the sanctuary look like? Is it traditional or contemporary?
There are few things less effective than a single tight shot of the podium or speaker for an entire program. As far as we know, the speaker could be in their living room. The voices or clapping off screen makes us uncomfortable, because we can’t place it in context. The establishing shot is not optional.
Allow the viewer to enter the service by starting with a wide, establishing shot to provide context before moving into the action. I’ll save additional camera placement for another post, but you want to place your wide shot camera in a position where the viewer can see the room, the audience, and the stage. Think in terms of showing the architecture and not just the people, if it helps.
An example
At Grace, our wide shot is camera 3. I have camera 3 positioned to the back and far right of the sanctuary.
It looks like this:
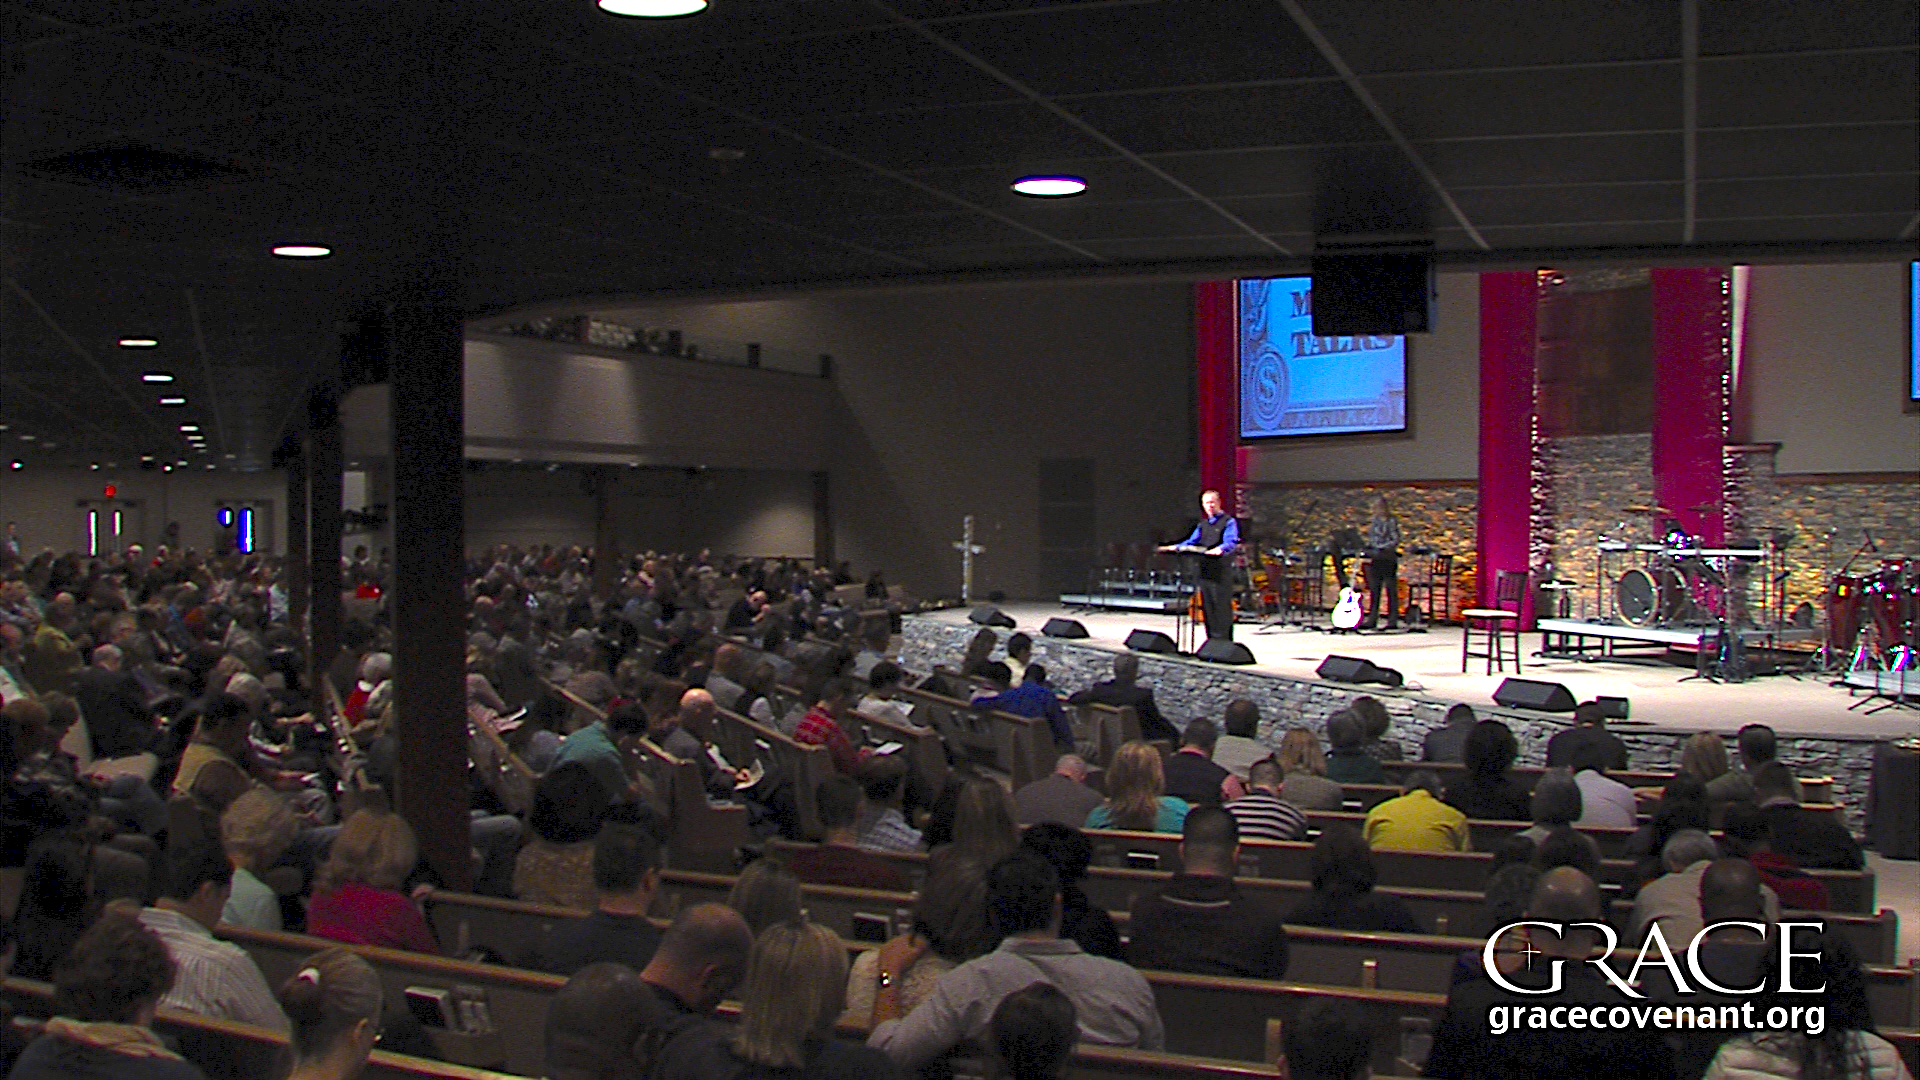
Thoughts about the composition of this shot and how I use this camera:
- this shot uses the rule of thirds as a guide. The pastor is 1/3 from the right edge of the screen.
- the balcony may feel “oppressive” (crowding the audience) but that is the room. This mirrors the live experience. Meaning, everyone in the sanctuary can see the balcony, so the viewer can too.
- this is the home base shot for camera 3. When there is no other assignment, the operator returns to this position.
- other shot options for camera 3 are a medium wide and loose head to toe. Also, camera 3 is on a dolly and can move to the front of the room and shoot a reverse angle shot. (You can just make out the aisle in the far right of the picture)
- we use this camera for crowd reaction: clapping, laughing, or responsive reading, etc.
- I use the wide shot to bridge the transitions between the main elements of the service.
- in addition to the above, I insert this shot into the sermon line cut every 8 to 10 minutes. I like to cut to a wide shot, at a minimum, when the Pastor transitions between the main points of his outline.
Be creative in using the camera that provides the establishing shot. If you only have a few cameras, it does not have to just sit on a wide shot the entire time. However, teaching the wide shot as the home base, insures that the operator is ready for a quick cut to capture audience reaction.
The establishing shot establishes context, and is a necessary and effective way to insure that your video is connecting with your viewers. Start your service DVD, program, or podcast with an establishing shot for best results.

Great advice! There are so many little nuisances that you don’t notice as a viewer until the are missing. Perfect tip for us video newbies!!
Thanks for sharing!
This is great information and something I wasn’t aware of. Watching the videos and reading the discussion about them is really helpful for me. Not that I will remember them right away but it plants a seed and hopefully it will grow.
David